[Jenkins] EC2 Ubuntu 환경에서 젠킨스 설치 및 구축
들어가기 전
AWS EC2 인스턴스 만드는 방법에 대해서는 아래 포스팅을 참고하시면 될 거 같습니다.
이번 포스팅에서는 Ubuntu환경에서 젠킨스를 설치하고 젠킨스 서버를 구축하는 방법에 대해 알아보겠습니다.
그리고 기본적으로 자바가 다운로드되어 있다는 전제하에 설명하겠습니다.
https://hoestory.tistory.com/37
[AWS] AWS EC2 인스턴스 생성
들어가기 전 AWS EC2 인스턴스를 생성하는 과정에 대해 알아보겠습니다. ◎ 순서 1. 인스턴스 생성 2. 탄력적 IP 주소 할당 3. 보안 그룹 생성 EC2 인스턴스 생성 인스턴스를 클릭을 해줍니다. 인스턴
hoestory.tistory.com
Jenkins 설치 방법
아래 명령어를 입력을 하여 젠킨스가 설치되었는지 안되었는지 확인할 수 있습니다.
jenkins --version
설치가 안되어 있다면 아래와 같은 메시지를 확인할 수 있습니다.
jenkins: command not found
https://www.jenkins.io/download/
Jenkins download and deployment
Jenkins download and deployment The Jenkins project produces two release lines: Stable (LTS) and regular (Weekly). Depending on your organization's needs, one may be preferred over the other. See the links below for more information and recommendations abo
www.jenkins.io
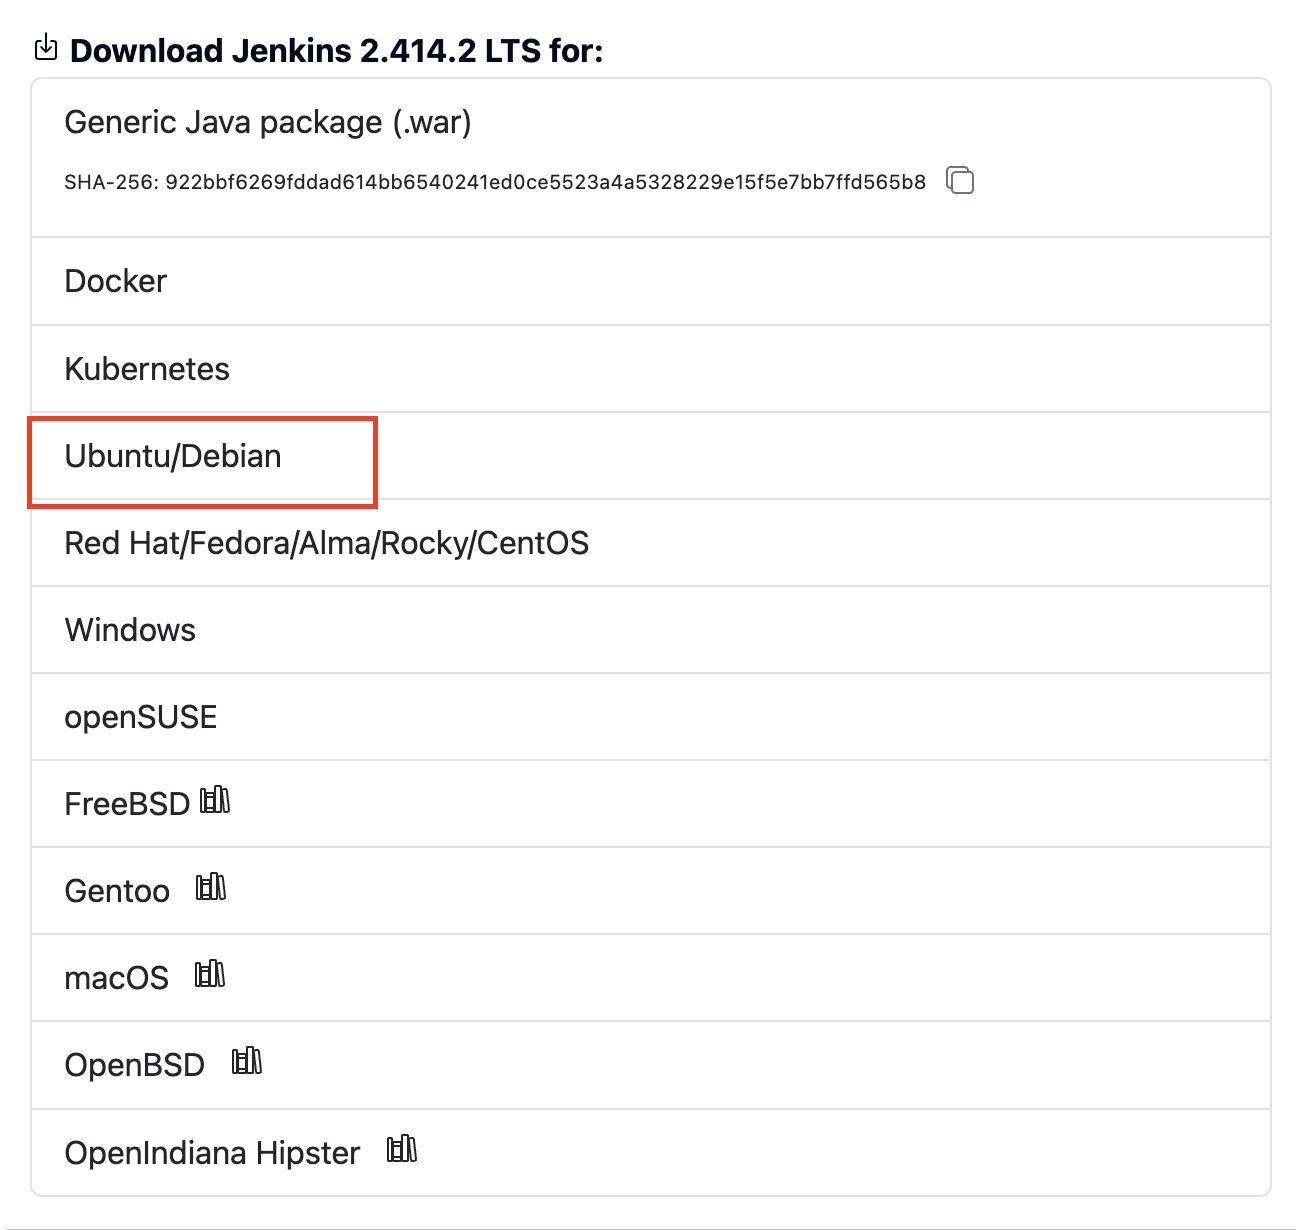
1. 위에 사이트로 들어가서 Ubuntu/Debian을 클릭합니다.
2. 아래 명령어들을 순서대로 실행시켜 줍니다.
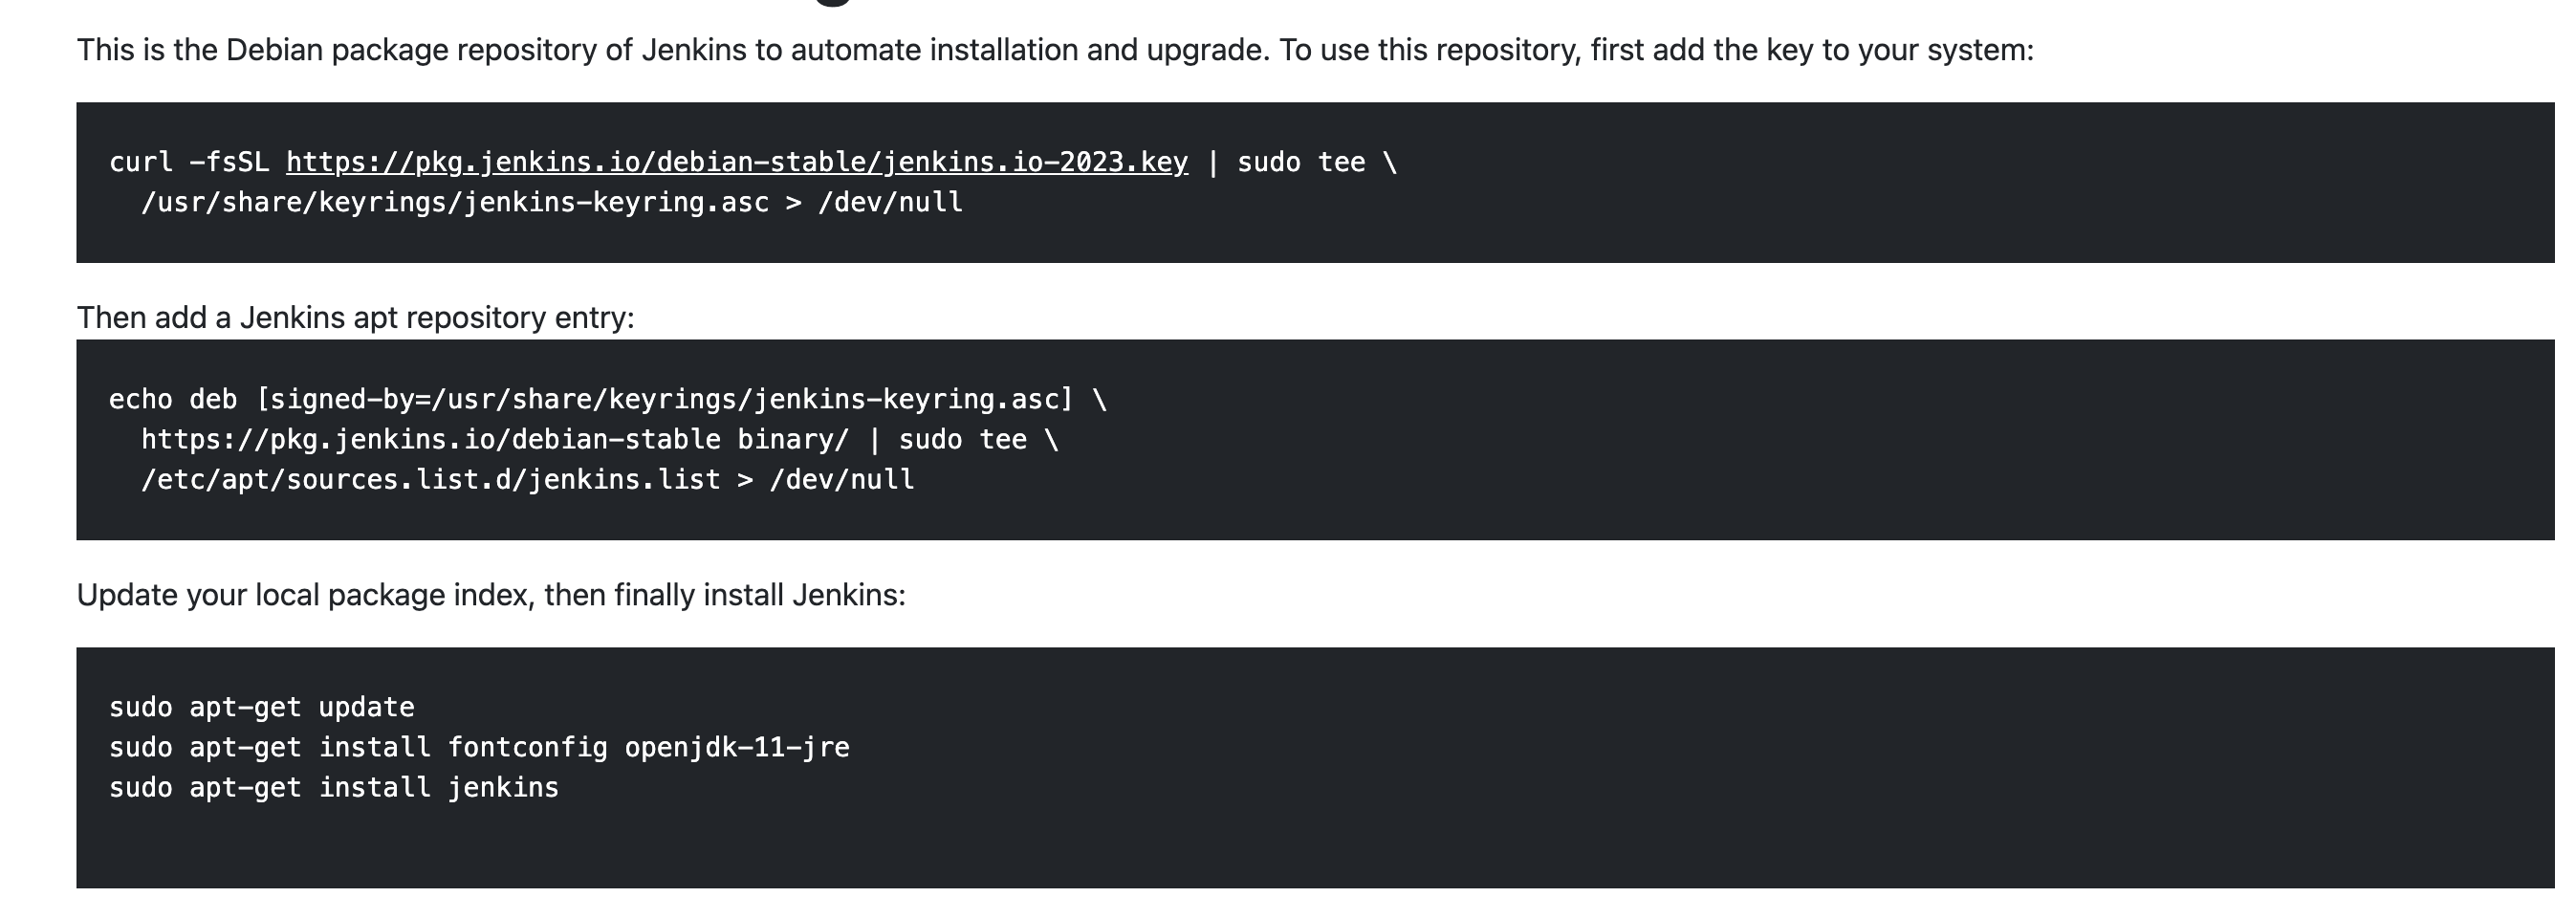
//1.
curl -fsSL https://pkg.jenkins.io/debian-stable/jenkins.io-2023.key | sudo tee \
    /usr/share/keyrings/jenkins-keyring.asc > /dev/null

//2.
echo deb [signed-by=/usr/share/keyrings/jenkins-keyring.asc] \
    https://pkg.jenkins.io/debian-stable binary/ | sudo tee \
    /etc/apt/sources.list.d/jenkins.list > /dev/null

//3.
sudo apt-get update
sudo apt-get install jenkins
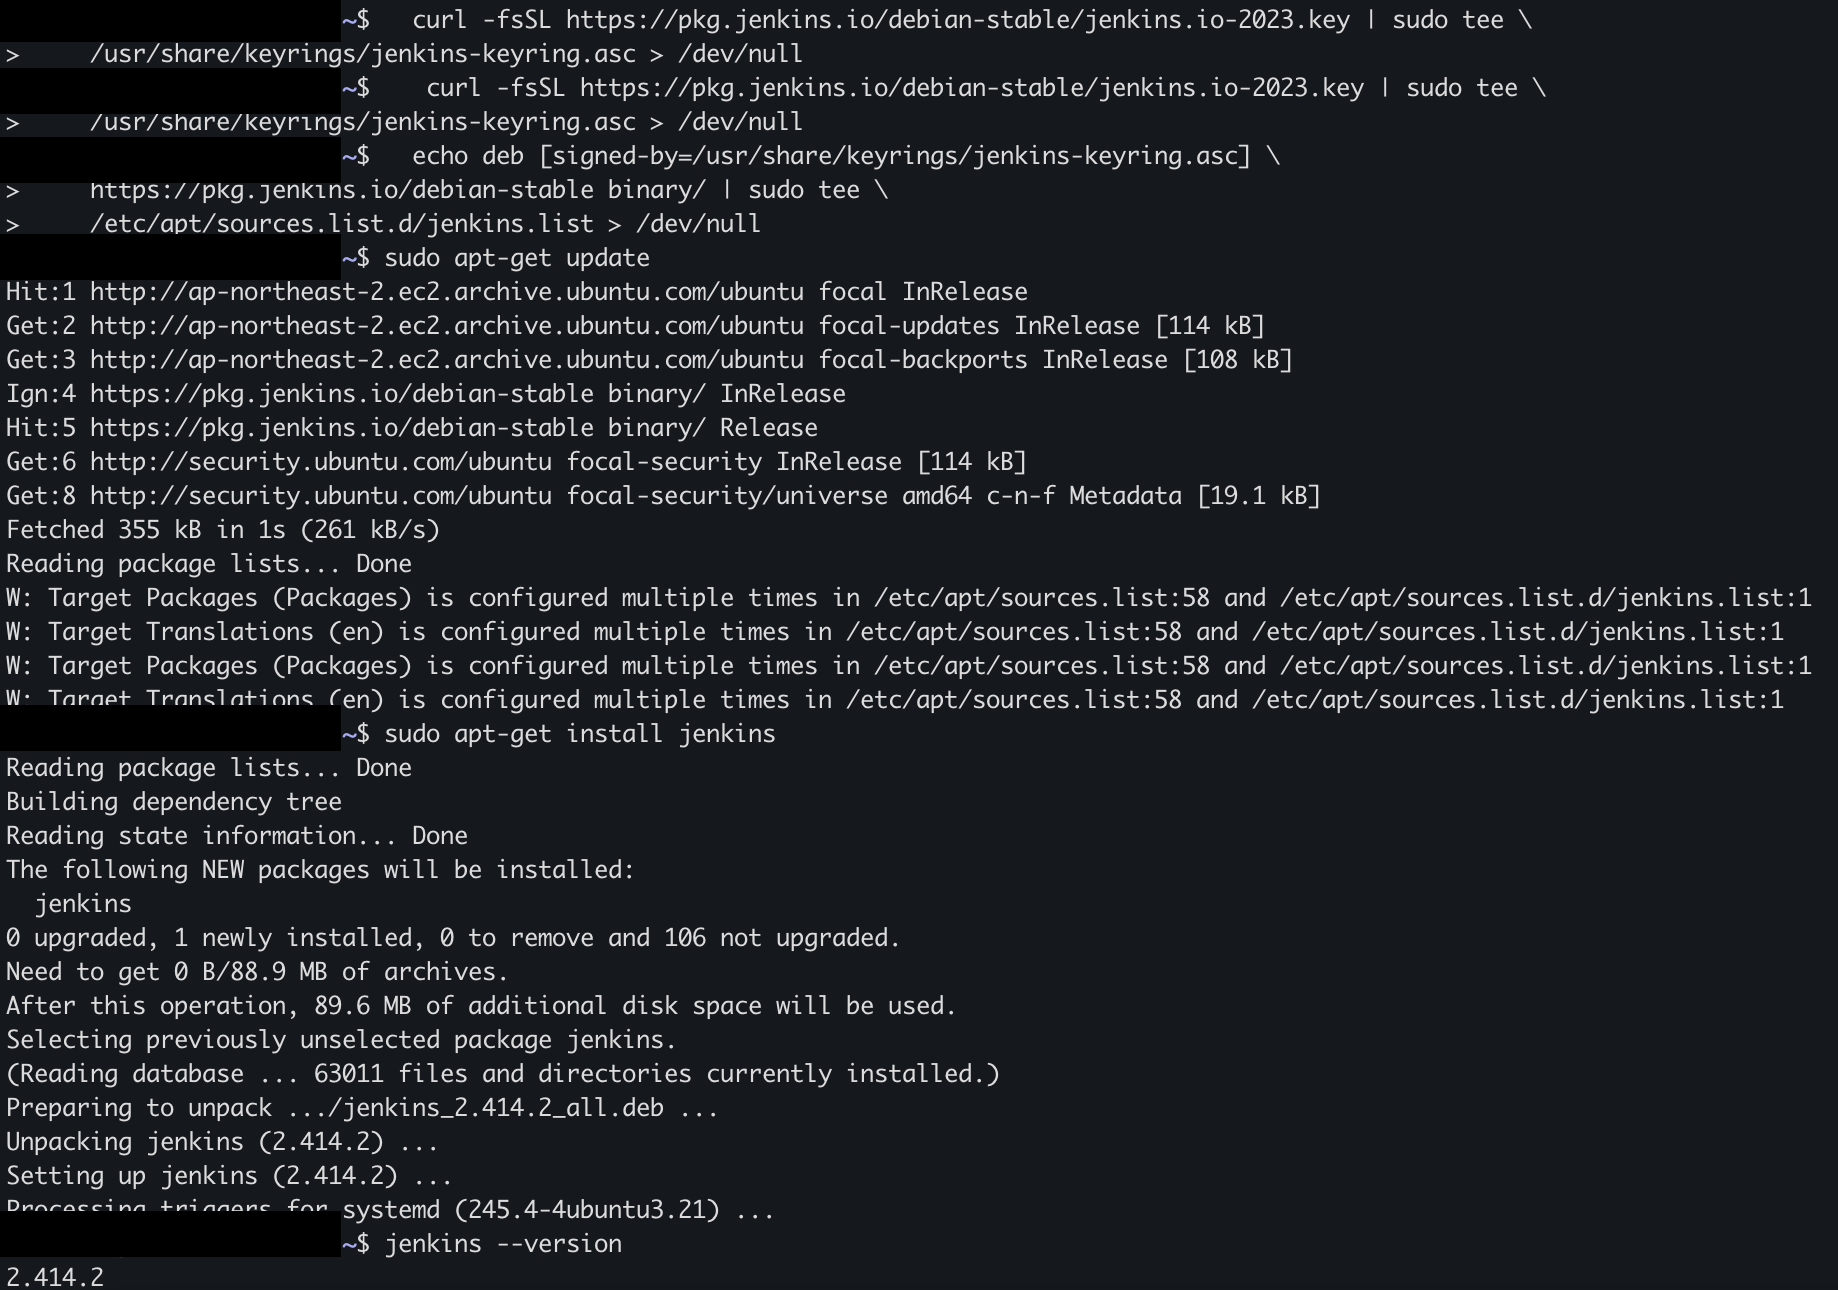
아래와 같이 되면 EC2에 Jenkins 설치가 완료되었습니다.
오류 메시지
위와 같이 정상적으로 동작하면 좋겠지만 설치 도중에 GPG Error이 발생할 수 있습니다. 아래와 같은 메시지가 GPG Error이 발생했다는 뜻입니다.
W: GPG error: https://pkg.jenkins.io/debian-stable binary/ Release:
The following signatures couldn't be verified because the public key is not available:
NO_PUBKEY {"불특정 문자"}
E: The repository 'https://pkg.jenkins.io/debian-stable binary/ Release' is not signed.
N: Updating from such a repository can't be done securely, and is therefore disabled by default.
N: See apt-secure(8) manpage for repository creation and user configuration details.
W: Target Packages (Packages) is configured multiple times in /etc/apt/sources.list:58 and /etc/apt/sources.list.d/jenkins.list:1
W: Target Translations (en) is configured multiple times in /etc/apt/sources.list:58 and /etc/apt/sources.list.d/jenkins.list:1
해결법
sudo apt-key adv --keyserver keyserver.ubuntu.com --recv-keys "불특정 문자"
위와 같이 입력을 하면 오류를 해결할 수 있습니다.
Jenkins 설정
Jenkins에 대한 Port번호를 바꾸는 설정입니다. 해당 부분은 포트번호를 변경하고 싶으신 분들만 참고하면 좋을 거 같습니다.
sudo vi /etc/default/jenkins
디폴트가 8080입니다. 원하는 포트로 변경하시면 됩니다.
위에 포트번호를 변경을 하였다면 아래에서도 위에 설정한 포트번호와 동일하게 설정해주셔야 합니다.
sudo vi /etc/init.d/jenkins
위 설명과 동일합니다.
sudo vi /usr/lib/systemd/system/jenkins.service

모든 설정이 끝났으면 아래 명령어를 입력하여 다시 시작을 합니다.
sudo systemctl daemon-reload
젠킨스 설치 및 설정을 끝마쳤습니다. 이제 젠킨스를 실행해 보겠습니다.
Jenkins 실행 방법
sudo service jenkins start //젠킨스 시작
sudo service jenkins stop // 젠킨스 정지
sudo systemctl status jenkins.service // 젠킨스 실행 상태 확인
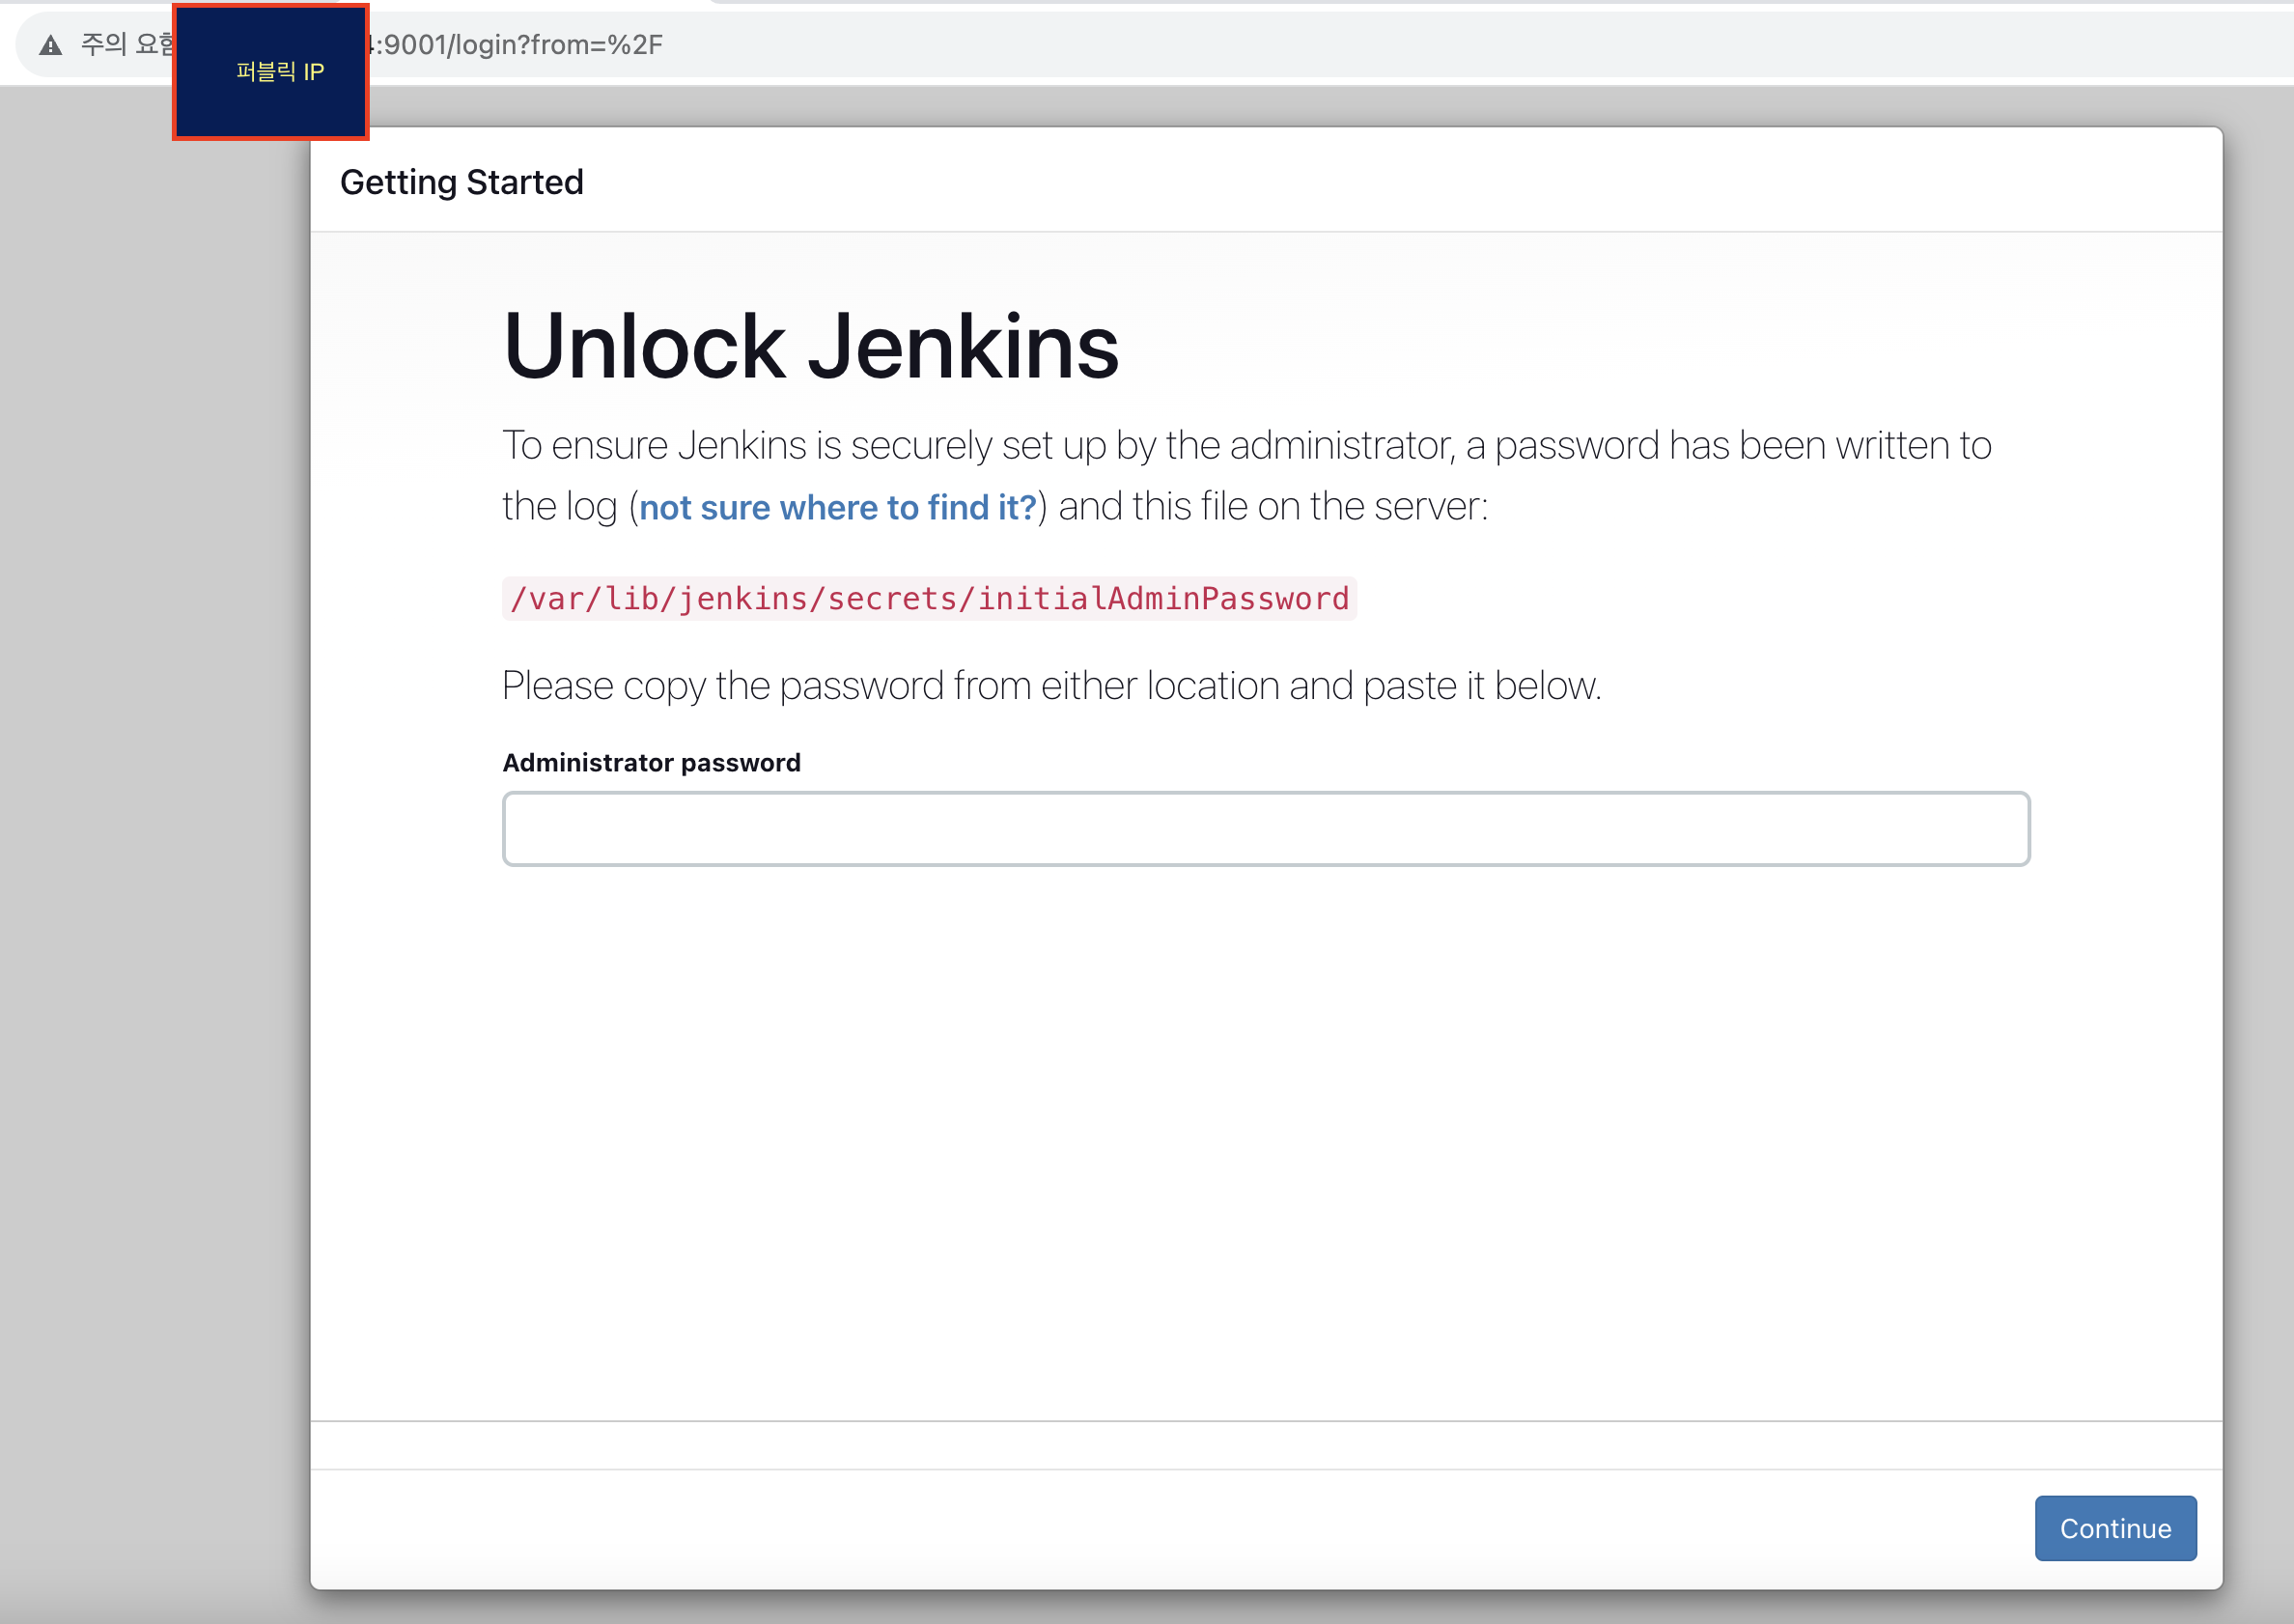
실행시키고 위처럼 페이지가 나오면 아래 명령어를 통해서 초기화 비밀번호를 입력해 주고 Continue를 클릭하면 됩니다.
sudo su //관리자로 접속
cat /var/lib/jenkins/secrets/initialAdminPassword
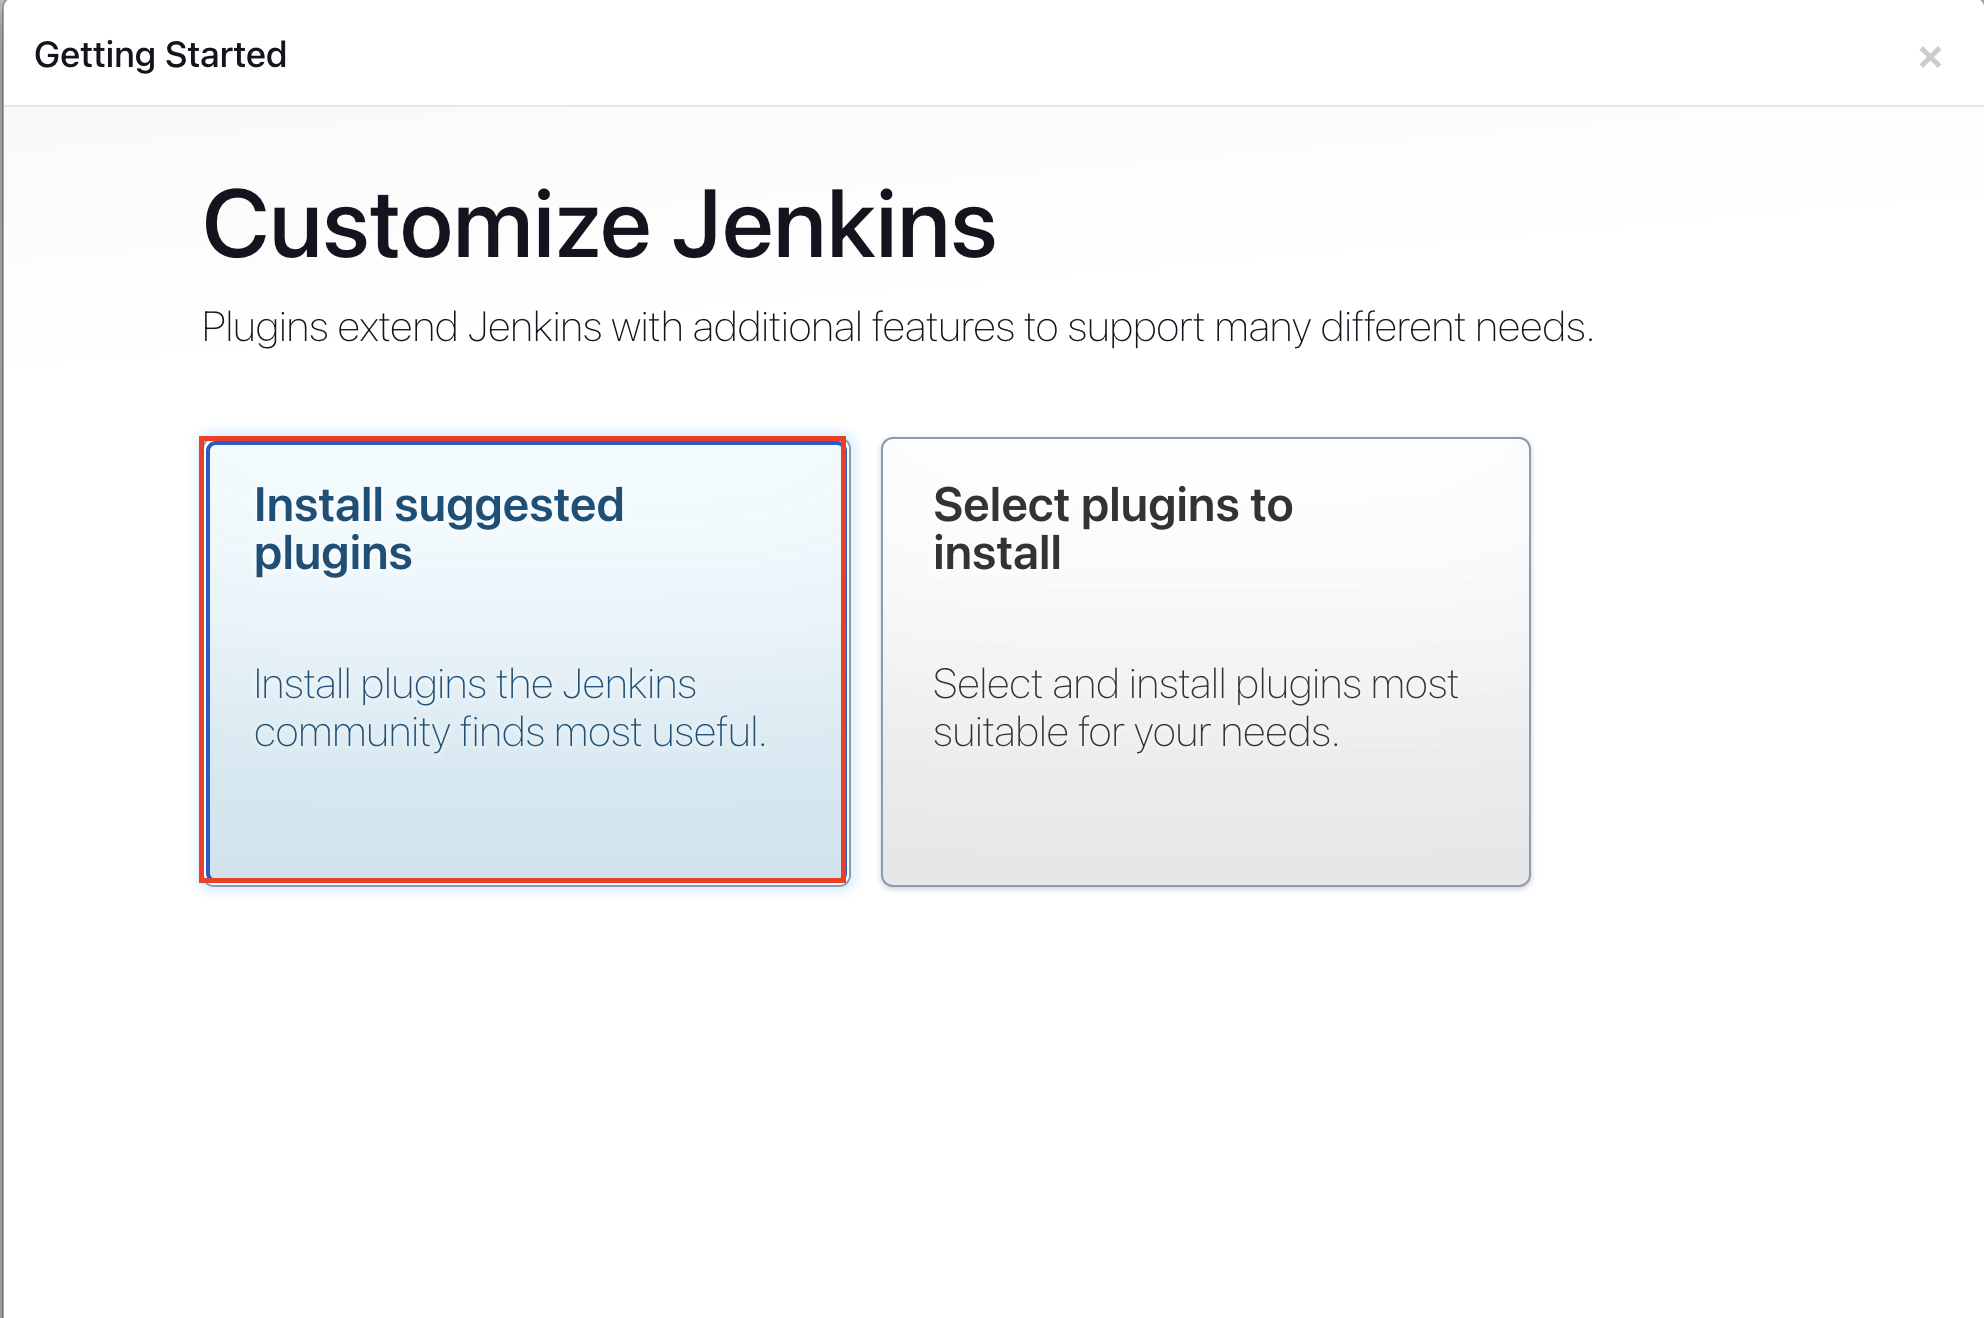
필자는 Install suggested plugins를 선택하여 모든 플러그인을 다운로드하였습니다.
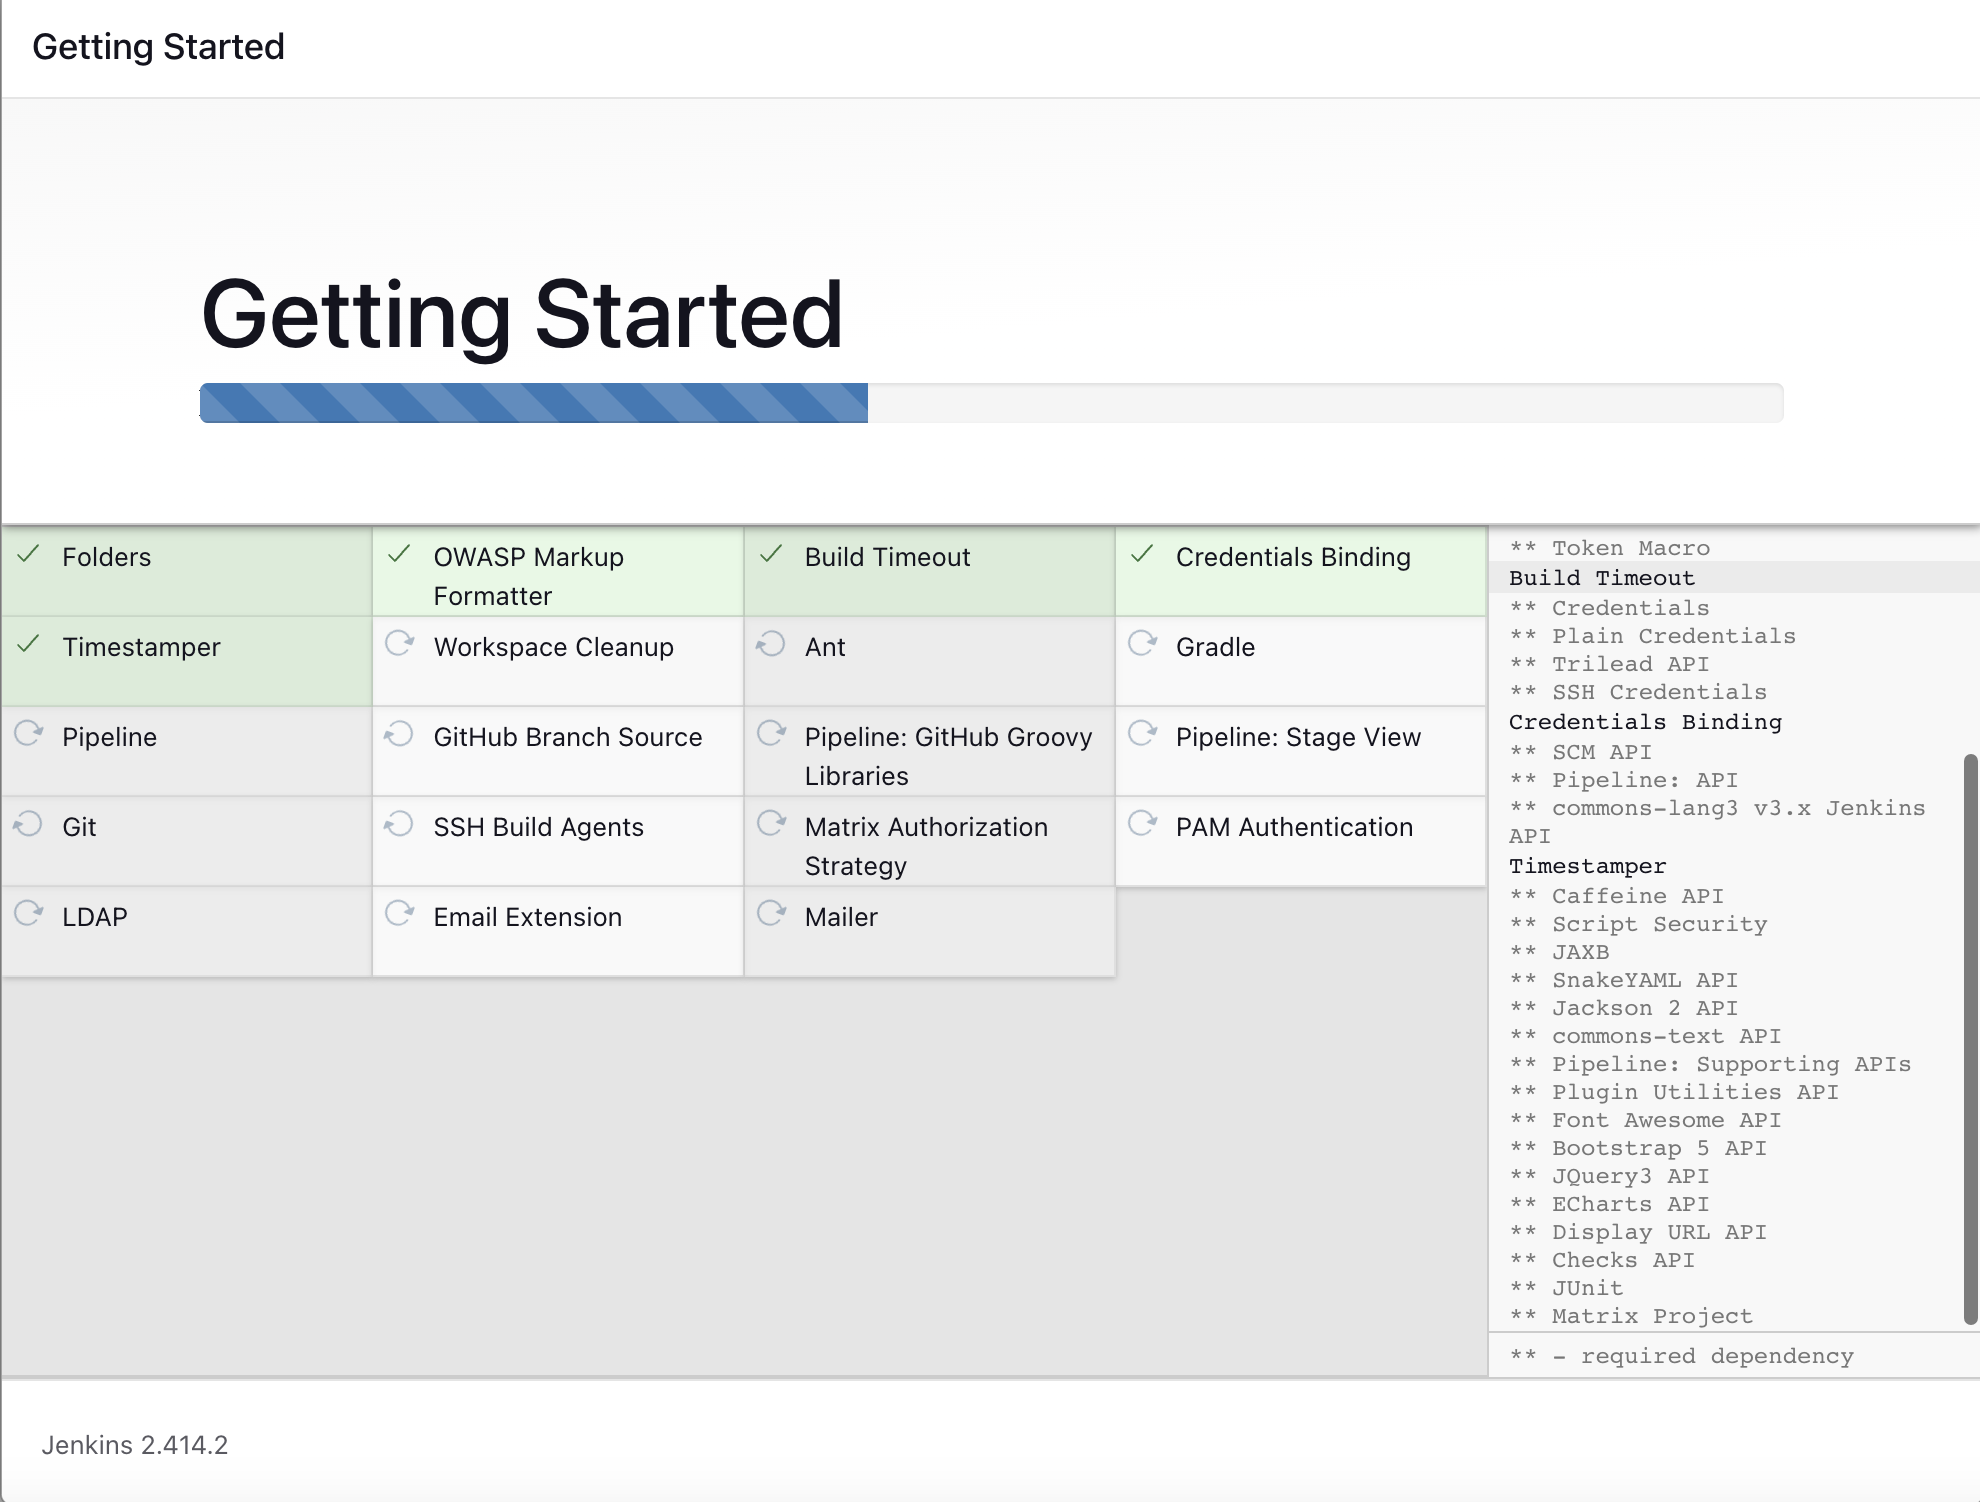
그럼 위와 같이 플러그인을 다운로드를 합니다.
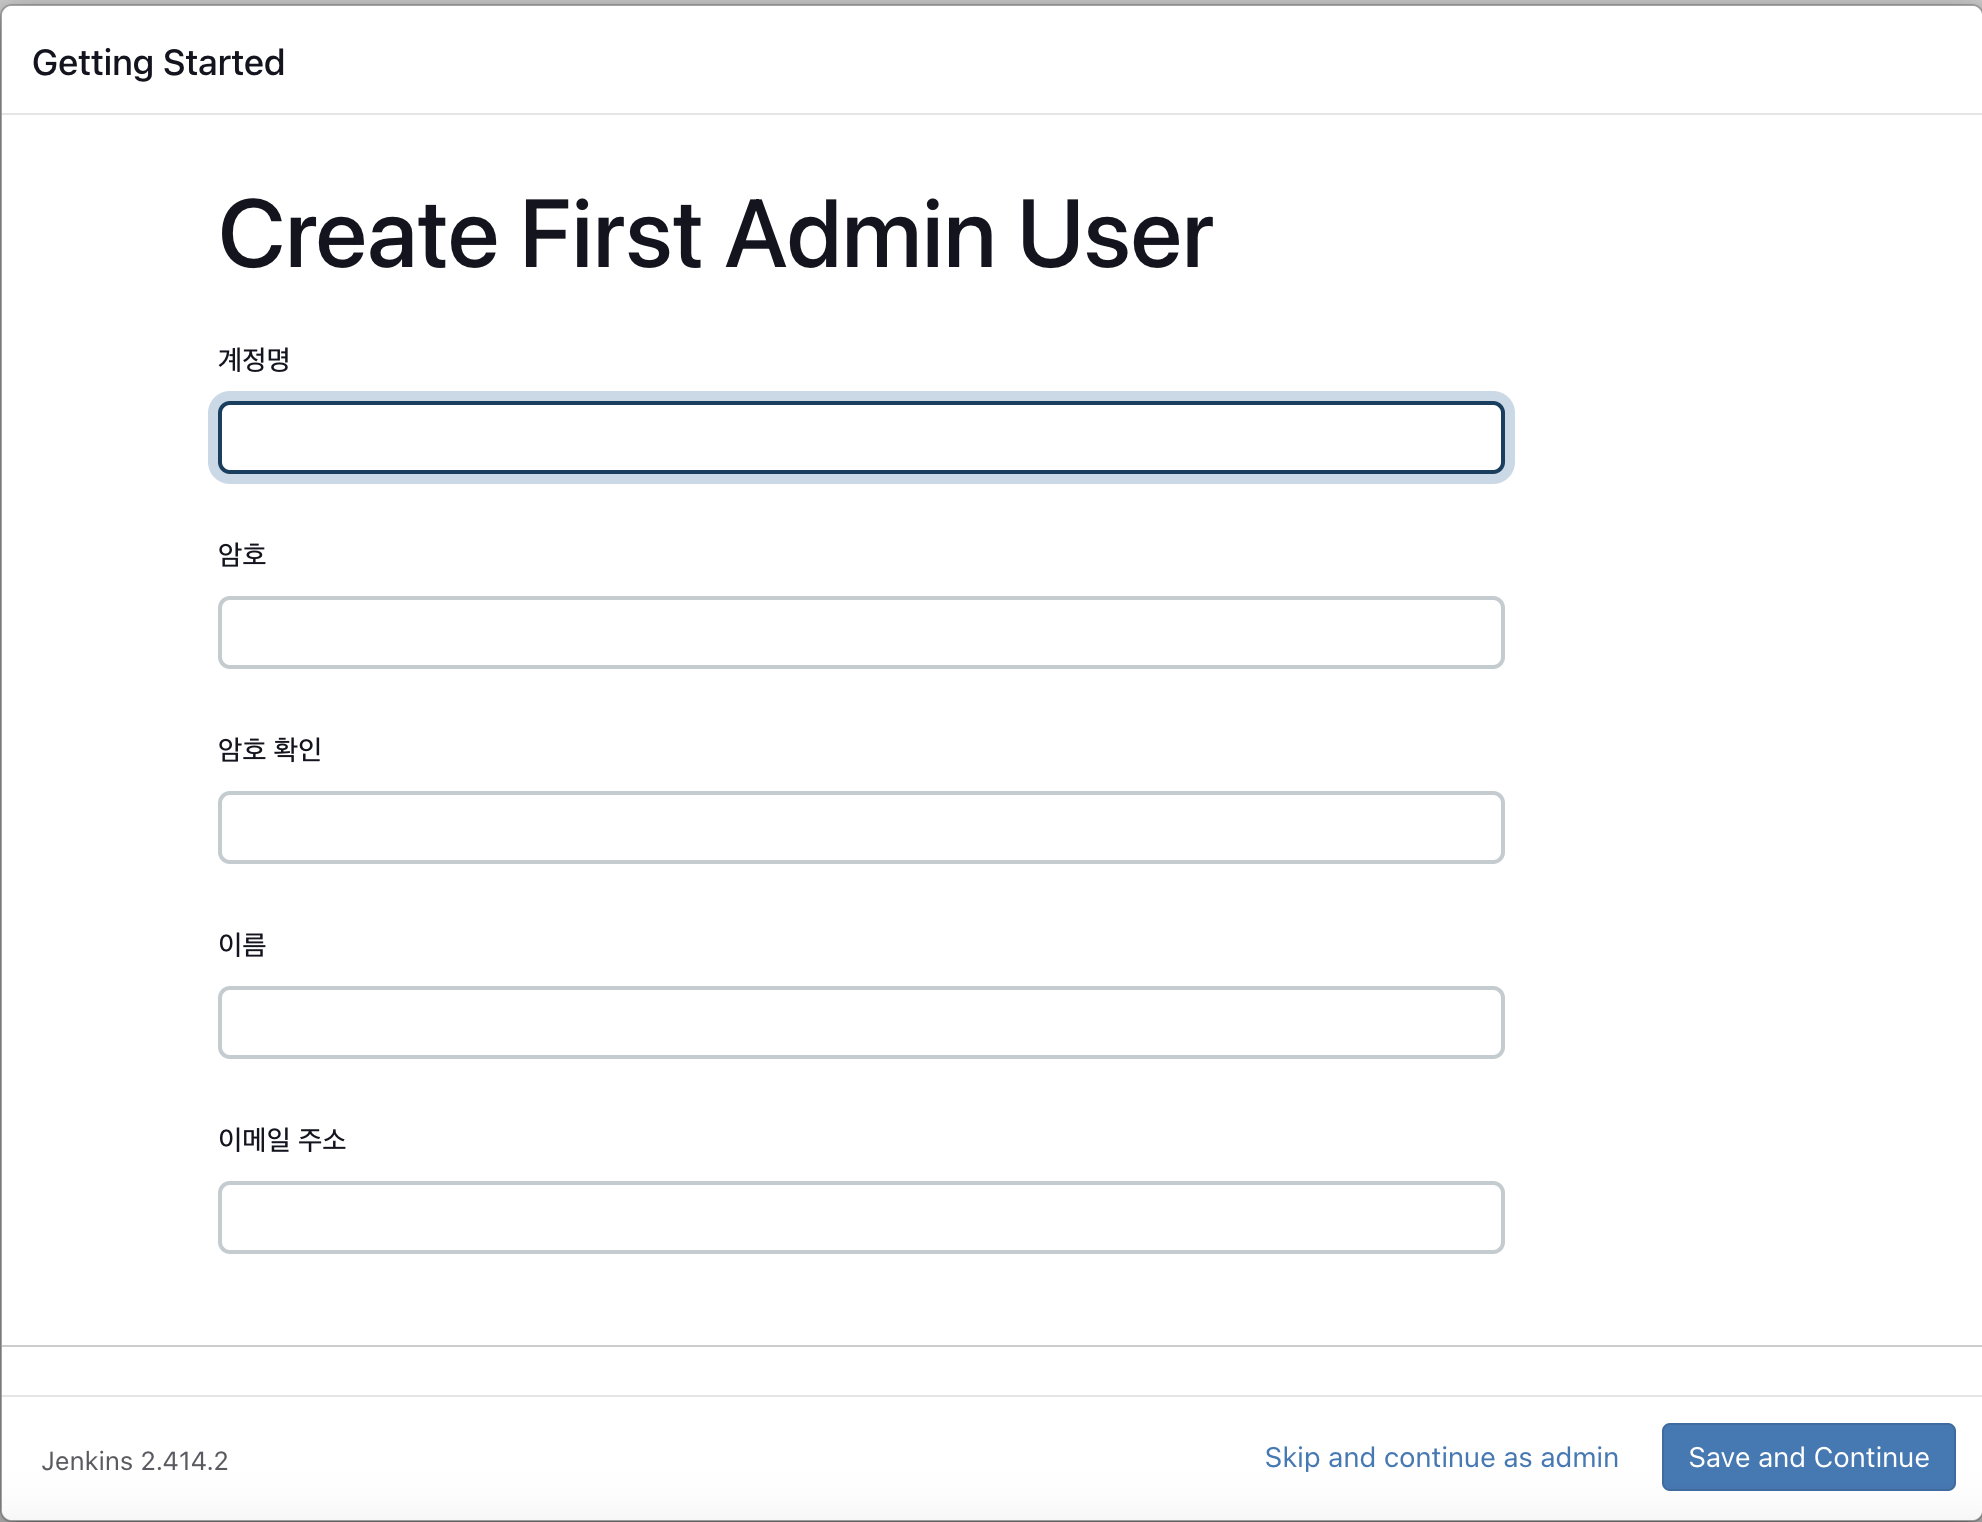
다운로드가 완료되면 아래 사진과 같이 계정정보를 입력하는 페이지가 나옵니다. 이때 계정정보를 설정하고 Save And Continue를 클릭하면 됩니다.
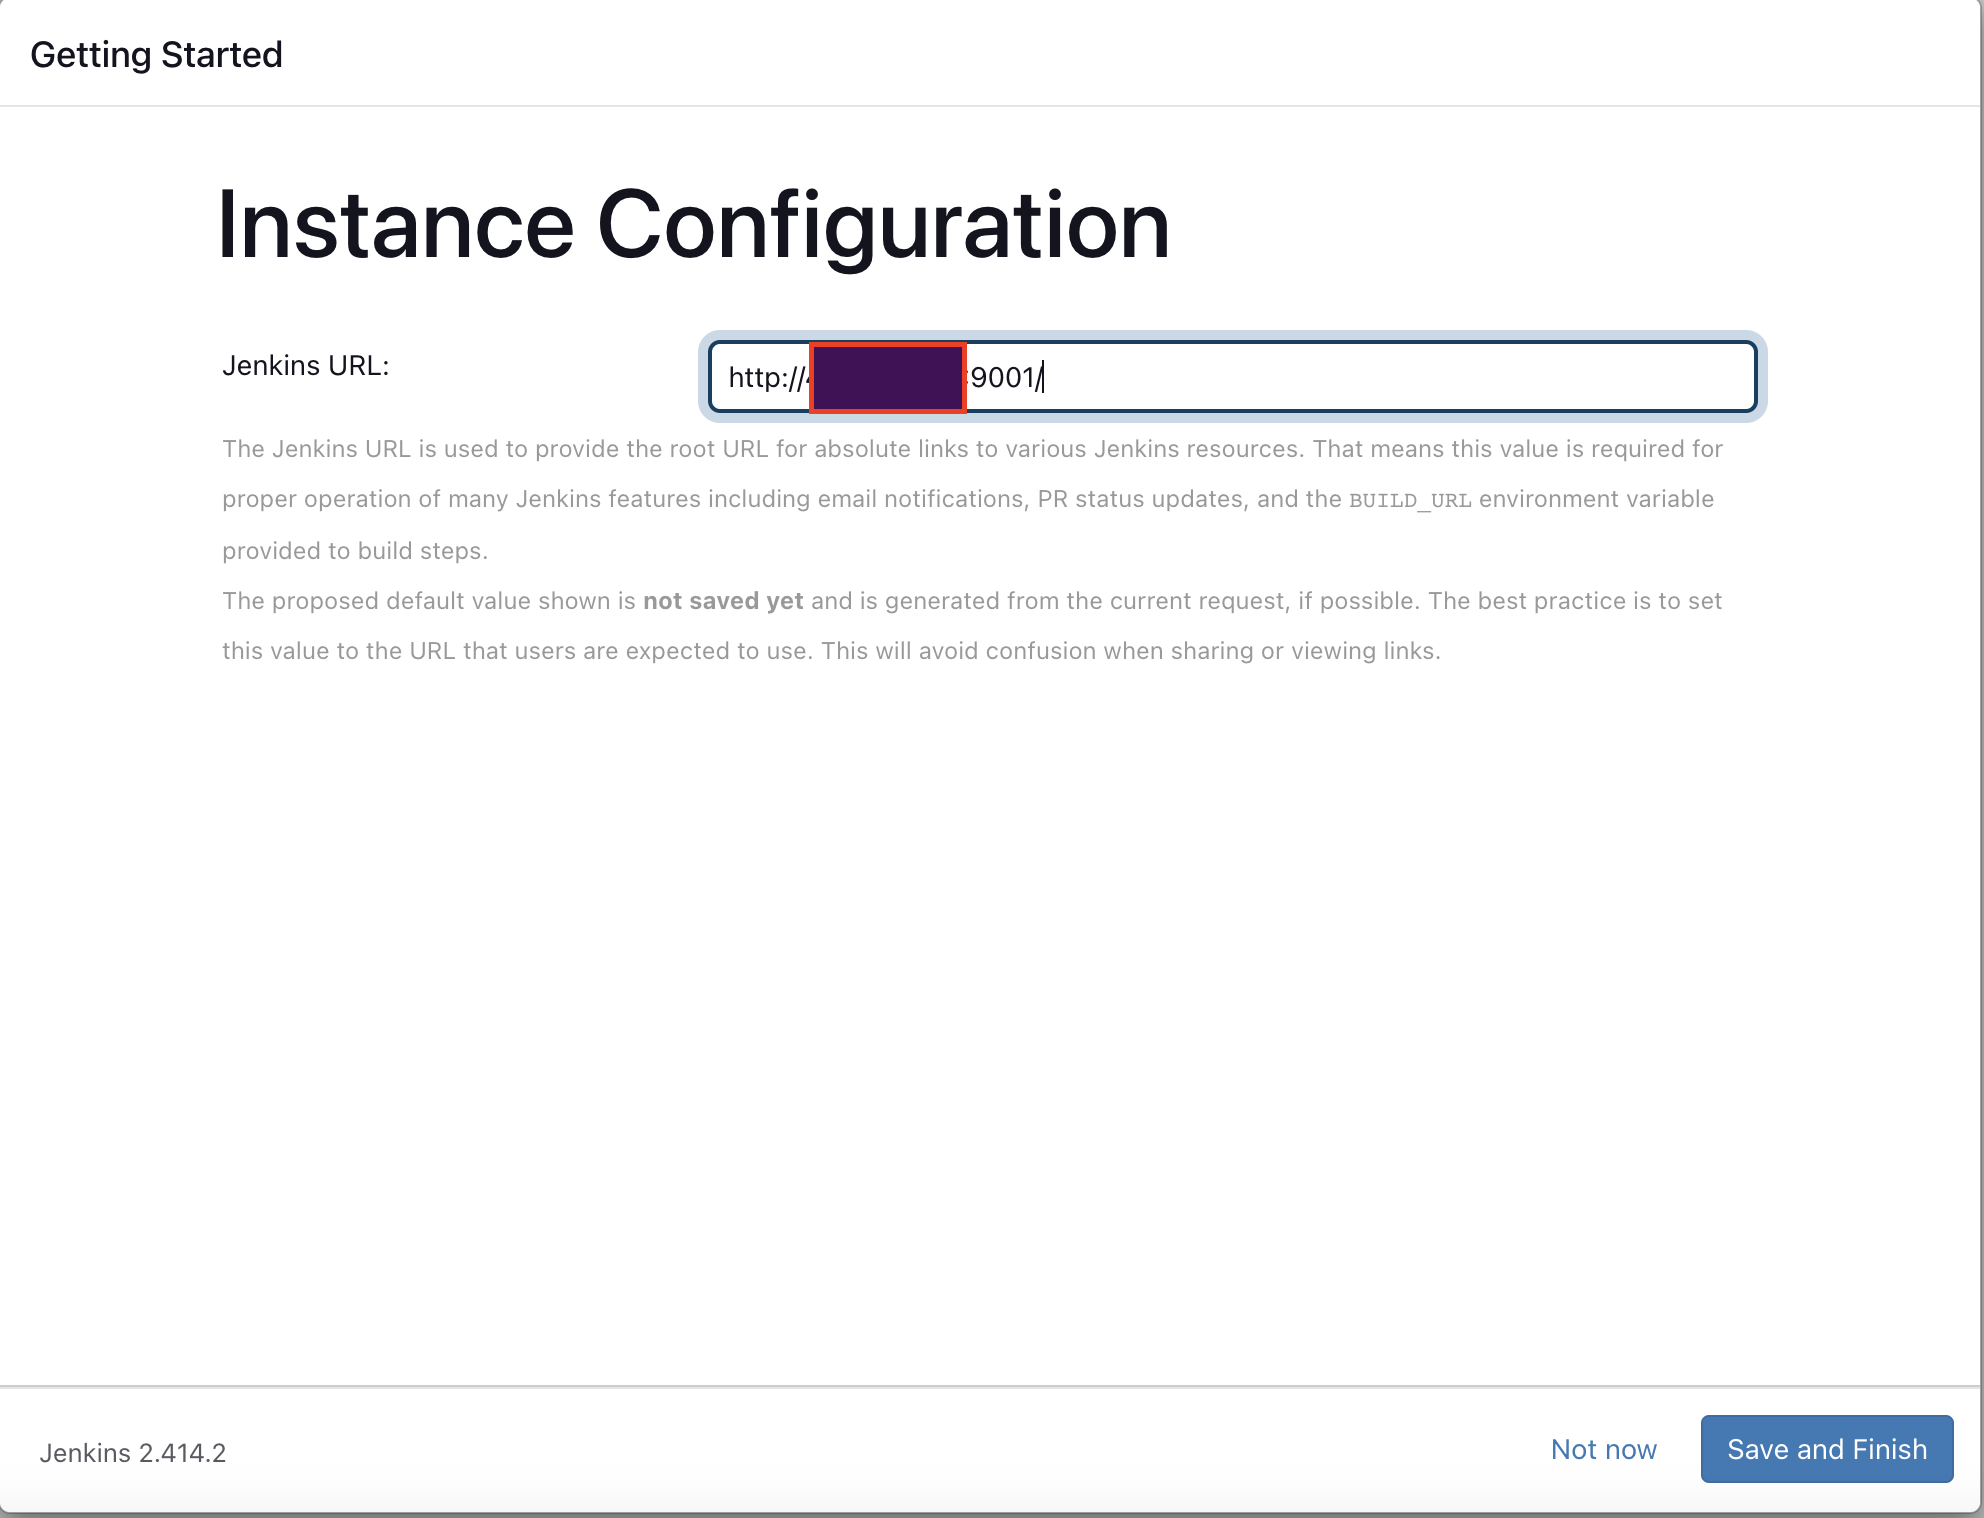
계정정보를 설정을 한 뒤 젠킨스에 접속할 IP주소와 설정했던 port번호를 입력을 하고 Save And Finish를 클릭하면 됩니다.

위와 같이 순차적으로 진행을 하면 AWS EC2에 젠킨스 설치 및 구축을 할 수 있습니다.
'DevOps' 카테고리의 다른 글
| [Git Action]Spring boot + GitHub Action 적용 시 빌드 실패와 관련된 에러 해결 방법 (6) | 2022.06.02 |
|---|